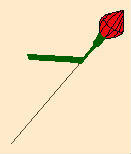
Hershey's Kiss Rosebud Favor
Click here for printer-friendly version!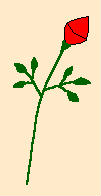
Public Disclaimer - Please Read!
Materials needed:
- Hershey's Kisses
- Double-sided tape (optional)
- Colored cellophane, cut into 4 1/2-inch squares
- 18-guage florist wire (cut in two equal lengths with wire cutters to get more roses per pack, or make long-stemmed rosebuds if you desire)
- Green florist tape
- Silk rose leaves (optional)
- Ribbon (optional)
Tools needed:
- Scissors (to cut the cellophane into squares)
- Wire cutters (to cut the wires in half, or trim the rose stems after they are made)
Instructions:
1. Optional first step: Using a small square of the double-sided tape, stick two foil-wrapped Hershey's Kisses together, bottom to bottom. (This isn't strictly necessary, but it helps some folks handle the kisses while wrapping.)

2. Take a four 1/2-inch square of cellophane. Place the tip of one of the kisses in the center of the square, then wrap the cellophane around both kisses, gathering the corners together around the tip of the other kiss. Wrap the gathered corners together as tightly as you can without tearing the florist tape.


3. Insert a florist wire into the gathered cellophane until it meets the tip of the Hershey's Kiss. (DO NOT push the wire into the chocolate! Many people have written to me to tell me that this makes the rosebud easier to make, but there is a good reason not to do this. Florist wire is not "food safe," and toxic substances from the paint and metal of the wire can contaminate the chocolate and make it unsafe to eat. Please be sure that when you make your rosebuds that the wire and the chocolate do not actually come in direct contact. An alternate to using wire is to use wood/bamboo skewers, which can be safely inserted into the kiss...many thanks to Kim for suggesting this!)
4. Tape the "rosebud" onto the wire with the florist tape. Continue taping down the length of the wire until it is completely covered.
5. Optional: Tape the silk rose leaves onto the stem, and/or decorate with a ribbon bow.
One reader writes: "I got married on June 5, 1999 and I made these as a thank you gift. We made about 250 and placed them in a small basket with styrofoam and it looked like a rose bush. This is a great idea."
Another reader, Kim, writes: I am in the process of making these for my upcoming wedding. I've found that instead of using the wire and then wrapping tape around it, it is much less of a pain to use green pipe cleaners instead. It looks just as good, but it is a faster process. Also, to add a personal touch, we used a metalic marker and wrote our names and the date on single leaf we attatched to each one.
From another reader: I've made these for special events and instead of using floral wire, I used long wooden skewers. They are pointy on one end and goes into the tip of the kiss nicely. Then you can wrap as directions say.
Elise writes: I've made these as bouquets. Instead of sticking the wire in the cellophane at the end, bend the wire so the head has a small circle, lay it flat against the bottom of the kiss then place another kiss on top. Then wrap with cellophane. Its much easier to handle. Also, you can make an "open" flower by using a small reeses cup with a kiss on top.
Marilyn writes: Instead of using wire, pipe cleaners, or skewers I used green colored lollipop sticks that are used for making candy molded lollipops.
Questions or comments? Send me an !
Back to the Wedding Crafts Page
© 1999 Yahoudi